Setting up Burp Suite — Part 2
Burp Proxy
It operates as web proxy server and it sits as a man-in-the-middle between the browser and destination web servers. It allows the interception, inspection and modification of the raw traffic passing between client and server

Burp Intercept
Burp intercept shows the intercepted request and response which are initiated from a browser or system network.
The burp intercept request and give various information about the request such as


The raw request is show here. Here you can see all the information of a request
The Params will print all the parameters such as cookies, GET,POST will be shown in tabular format
Headers of the dissected request will be displayed here
The request in Hex format is displayed here
Burp proxy is the first place your request will come. Here you can modify a request , response and then proceed with the modification without letting anyone know.
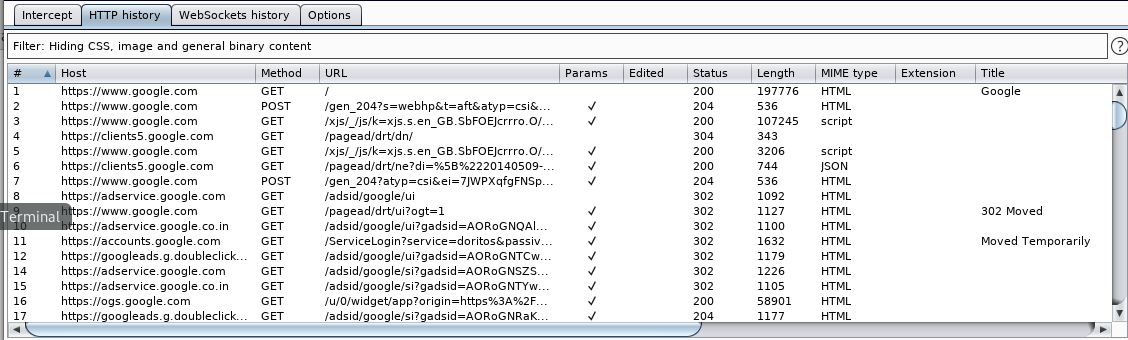
HTTP history will give the list of all the request made through burp proxy

Burp Suite is capable to intercept web socket message also which are logged in WebSockets History
Proxy Options
This is a important section of the burp suite. There are various options , settings and configuration available for how you want to intercept the request.
Proxy Listener
A Proxy listener is a local HTTP proxy server that listens for incoming connections from your browser. It allows you to monitor and intercept all requests and responses, and lies at the heart of Burp’s user-driven workflow. By default, Burp creates a single listener on port 8080 of the loopback interface. To use this listener, you need to configure your browser to use 127.0.0.1:8080 as its proxy server. This default listener is all that is required for testing virtually all browser-based web applications.
You can change the listening port by click on the “Add” and specify the port to be used for listening to the incoming requests
Intercept Client Requests and Responses
These settings control which requests and responses are stalled for viewing and editing in the Intercept tab. Separate settings are applied to requests and responses.
The “Intercept” checkbox determines whether any messages are intercepted. If it is checked, then Burp applies the configured rules to each message to determine whether it should be intercepted.
Individual rules can be activated or deactivated with the checkbox on the left of each rule. Rules can be added, edited, removed, or reordered using the buttons.
Intercept WebSockets Message
Use these settings to control which WebSocket messages are stalled for viewing and editing in the intercept tab.
You can configure separately whether outgoing (client-to-server) messages and incoming (server-to-client) messages are intercepted.
Response Modification
These settings are used to perform automatic modification of responses. You can use these options to achieve various tasks by automatically rewriting the HTML in application responses.
The following options may be useful to remove client-side controls over data:
- Unhide hidden form fields. (There is a sub-option to prominently highlight unhidden fields on-screen, for easy identification.)
- Enable disabled form fields
- Remove input field length limits
- Remove JavaScript form validation
Match and Replace
These settings are used to automatically replace parts of requests and responses passing through the Proxy. For each HTTP message, the enabled match and replace rules are executed in turn, and any applicable replacements are made.
Rules can be defined separately for requests and responses, for message headers and bodies, and also specifically for the first line only of requests. Each rule can specify a literal string or regex pattern to match, and a string to replace it with.
TLS Pass Through
These settings are used to specify destination webservers for which Burp will directly pass through TLS connections. No details about requests or responses made via these connections will be available in the Proxy intercept view or history.
Misc
These settings control some specific details of Burp Proxy’s behavior. The following options are available:
- Use HTTP/1.0 in requests to server
- Use HTTP/1.0 in responses to client
- Set response header “Connection: close”
- Set “Connection: close” on incoming requests
- Strip Proxy-* headers in incoming requests
- Remove unsupported encodings from Accept-Encoding headers in incoming requests
- Strip Sec-WebSocket-Extensions headers in incoming requests
- Unpack GZIP / deflate in requests
- Unpack GZIP / deflate in responses
- Disable web interface at http://burp
- Suppress Burp error messages in browser
- Don’t send items to Proxy history or live tasks
- Don’t send items to Proxy history or live tasks, if out of scope